
Good afternoon readers !
We hope everyone's doing great on this fine Tuesday afternoon as we bring you another series of Design Inspirations using DCWV stack pads, and this time it is the beautiful Collage Musings, all designed by our DT Jill Ahermouch. Read on and be inspired !
Hello crafters!
This morning i would like to share with you all, a layout i made using this beautiful paper from the DCWV Collage Musings stack pack. The colours are great and I loved the delicate flowers.
This is the paper before i started:

I cropped my photo so it would fit into the frame in the bottom corner. Next, I lightly distressed the edges of the photo using Tim Holtz distress ink (walnut stain). Then I adhered the photo onto brown cardstock. I distressed the edges of the brown cardstock too.

Next I made my embellishments. In this layout I decided to add a small note (journal) but I wanted to keep it hidden so I decided to make a tag which could be pulled out from behind the photo. The tag I used came ready-made in the same DCWV stack pack. I cut it out, distressed the edges, added some twine and my personal journal. I also cut out a ‘family’ tag from the same page and distressed the edges of that too.
For the green foliage, I used Dusty Attic chipboard die cuts and I coloured them with glimmer mist (green meadow). The butterfly was made with cardstock and a Tonic butterfly punch. I distressed the wings with Tim Holtz distress ink (walnut stain).

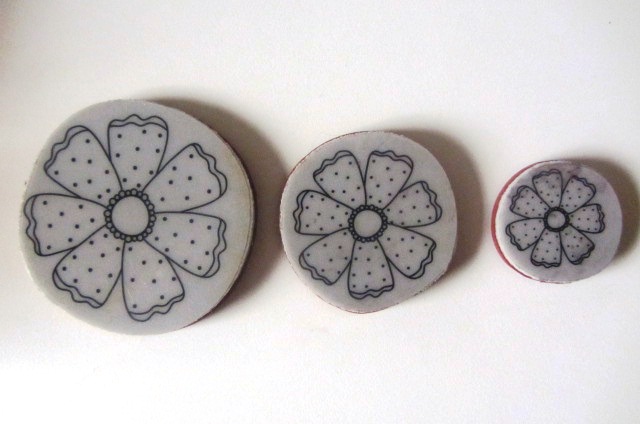
The flowers were made using a Hero Arts stamp set. I stamped small, medium and large flowers onto co-ordinating paper (also from the same DCWV stack pack), distressed the edges and assembled the flowers using dimensionals to give them depth. To finish them off, I tied some pink bows using twine to some pink buttons and glued them to the centre of each flower. For the largest flower, I added a few layers of punched scalloped circles underneath in co-ordinating papers to give it some added interest and dimension.

Finally, I assembled all the components of my layout making sure not to adhere the left side of my photo where my journal tag is placed.
Here is my finished project:

Have you been inspired today? I had great fun creating this layout. Maybe you could give it a try too?
Best wishes,

Design Team Member for Paper Lane
